
Cloudflare Warp is a software solution that routes your internet traffic through Cloudflare’s secure network using the Warp protocol. By using Cloudflare’s public IP instead of your ISP’s, it helps protect your data and shield you from certain types of cyberattacks.
A second major benefit is enhanced privacy. Since your traffic is routed through Cloudflare, your ISP cannot monitor your online activities. This also allows you to bypass government-imposed internet blocks and censorship, granting you freer access to the web.
Installation
There are two major popular types of Linux distros, we will see, how to install Cloudflare Warp on both of them one-by-one.
This blog has the following goals for installation of Cloudflare Warp client and general troubleshooting.
- Installation on Traditional/Mutable Linux Distributions
- Installation on Immutable Linux Distributions
- Troubleshooting the
systemd-resolvedDNS Resolver with no custom configuration and Warp Client - Fixing the issues with custom DNS configuration with
systemd-resolvedand Warp Client
You can directly follow the official installation instructions here and can skip the installation steps. If you have installed and registered it already then simply go to this section for the issues and fixes.
Traditional Linux Distributions
These are your normie distros like Ubuntu, Linux Mint, Arch Linux etc., where system files, user, and system configuration files can be created/deleted and modified freely. It allows you to install packages via normal Package managers like apt, pacman, yum, zypper, dnf etc. If you aren’t already familiar with the concept of immutable/atomic Linux distros, you’re most probably not using the one.
For Ubuntu and Ubuntu Based Distros (Mint, PopOS etc.)
To add Cloudflare GPG keys:
|
|
Add the repo to your APT respositories:
|
|
Refresh the APT package database and install the software:
|
|
For RedHat Based Distros (including openSUSE)
Add the repo:
|
|
Now update the package database:
|
|
Install Cloudflare warp client:
|
|
Immutable/Atomic Linux Distributions
The steps for adding the repo to your sources is similar as above for Debian/Ubuntu, RHEL based distros. The only difference will be in the installation of the client, as on immutable distros we don’t have access to the normal package manager.
For Fedora/Based Atomic Distributions
After adding the repo to your sources list. Update the package database:
|
|
Now layer/install the client on the host image:
|
|
For OpenSUSE based Atomic Distros (Aeon etc.)
After adding the source as above you can install the client as follows
|
|
If above command can’t find the Warp client, simply reboot and then try.
Using Warp Client
If you have carefully followed the installation instructions, you will have the warp-cli in your path. It simply means you would be able to execute warp-cli command from your terminal.
Sometimes Warp Systemd service doesn’t start automatically while installing, so:
|
|
This will enable and start the systemd service, you will normally able to use warp-cli command.
Here is the Official Guide for warp-cli usage and initial setup.
On Atomic/Immutable distros, you will need to reboot your PC, to get Warp client working. On normal distros, if the warp-cli isn’t available right away, simply close then reopen the terminal.
First register the client (First timers only)
|
|
Then connect the client:
|
|
Check the status:
|
|
It should say connected.
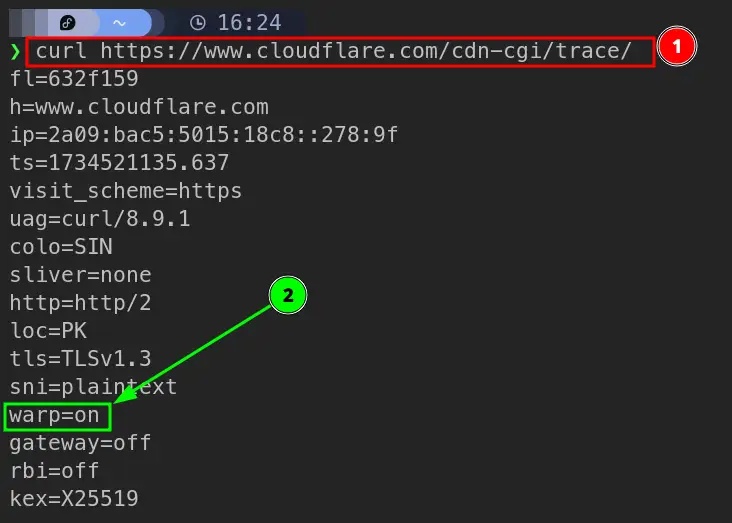
Check if you’re connected via Warp protocol:
|
|
Look for warp=on
General Issues and Fixes
systemd-resolved with no custom configuration
- For systems using
systemd-resolvedas a DNS resolver, you will need to add following to your/etc/systemd/resolved.conffile :
|
|
And restart the systemd-resolved service:
|
|
Now connect the warp-cli again with the command warp-cli connect and check the status warp-cli status if it shows connected now.
- If you are still unable to get connected, deleting the
resolved.conffile altogether might help.NetworkManagerwill be to still resolve the DNS.
Instead of deleting, you can do this:
|
|
Now restart the systemd-resolved service again. Check warp-cli status, you might have the connection established and internet access available.
systemd-resolved With Custom Configuration
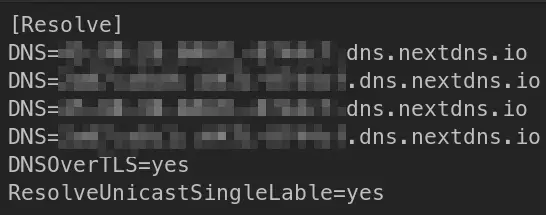
- I personally use
nextDNSas my upstream DNS resolver, myresolved.conffile looks like this:
So for me, all the above fixes don’t work. As warp-cli by default tries to connect with warp mode which is in normal terms, tries to proxy the DNS queries too along with tunneling your normal traffic through Cloudflare Network.
I get the following error:

- To fix this, we need to change the default mode to
tunnel_only
Here are the different modes available for warp-cli client:
|
|
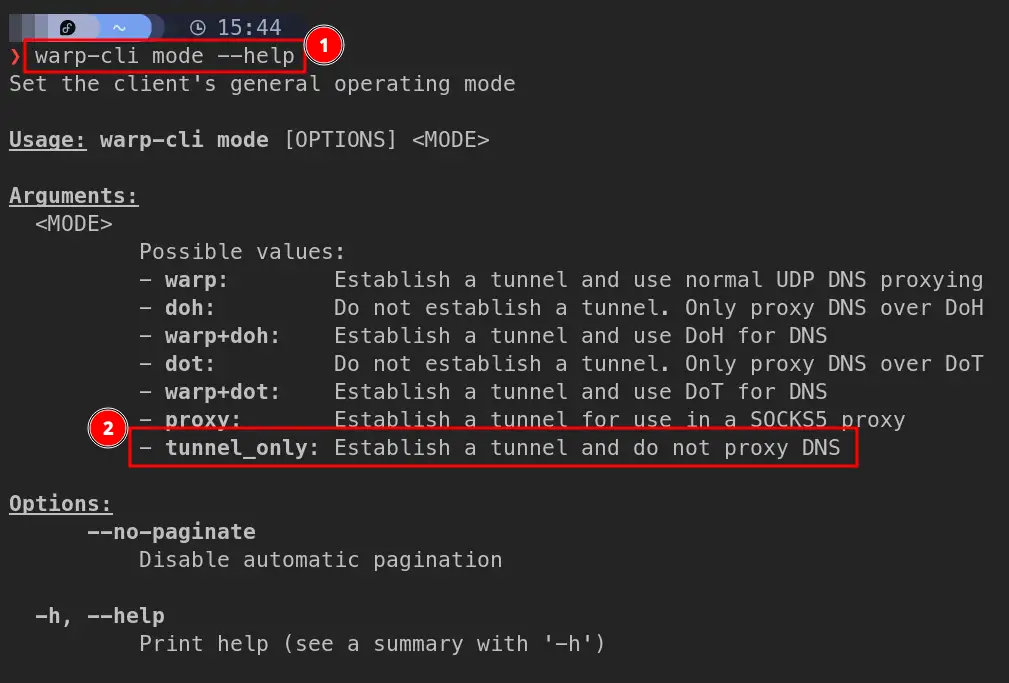
As the tunnel_only mode does not proxy the DNS, this is the mode we need to use alongside our custom DNS for upstream resolution.
- To change the
warp-climode:
|
|
Now disconnect and connect again:
|
|
To verify, you’re connected to the tunnel, warp-cli status, it should say connected.
To verify if I’m still using nextDNS (for nextDNS only), I can use:
|
|
It will show if I’m using nextDNSor not, also my device name and protocol used.
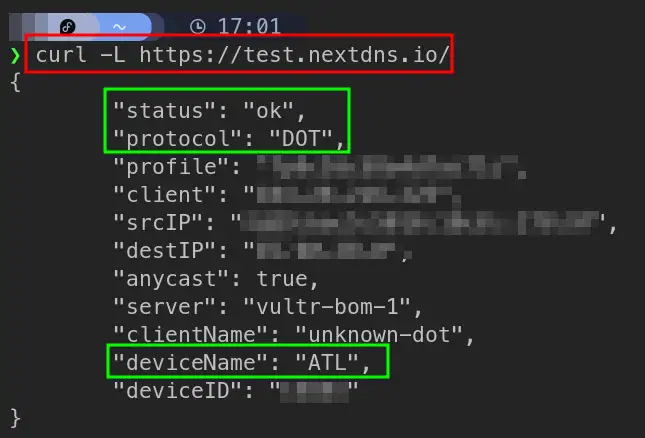
So, I’m successfully able to route my traffic through Cloudflare network using Warp Protocol and still using my custom upstream DNS provider (nextDNS).
Bypass Censorship
By-default, Cloudflare Warp uses wireguard protocol, but your ISP (Internet Service Provider) or Government might block the protocol used by wireguard for censorship or other reasons.
Please try cloudflare’s new developed MASQUE protocol which might let you connect to the internet in the oppressive regimes
|
|
Final Thoughts
I hope you’re now connected to your Cloudflare Warp tunnel successfully. If you need further clarification or help at any step you can comment down below. Warp on!